MY WORK and Play
Student work, teacher step-by-step and samples of some projects. Be my guest, share, create, pay it forward."Tell me and I forget, teach me and I remember, INVOLVE me and I LEARN"
Sunday, November 24, 2013
Thursday, March 14, 2013
Monday, July 2, 2012
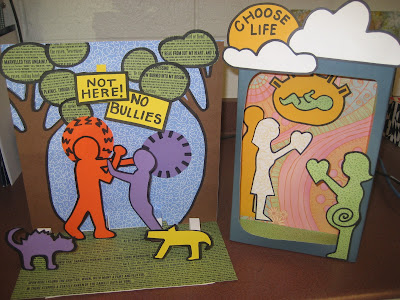
Kieth Haring- Social Issue Sample
I wanted the students to come up with a social issue and use Kieth Harings style and example to create a project. These are my examples. No Bullies and with people in our family who have to adopt, I thought the Choose Life would be one I could be passionate about.
Here's some student examples.
Here's some student examples.
 |
| Recycling |
 |
| Care, don't stare - Pride |
 |
| Stop Teen Suicide |
School Art Display
This is a display of my students work.
The paintings are from the Art 1, 7th graders Impressionism landscapes and the Egyptian sculptures are from the 3D Design class, 8-9th graders.
Student Work - Expressionism
A few examples. The assignment was "What Makes YOU Scream." They completed a paper that got them thinking about situations or moments that make them want to scream, then they came up with a design for their self portrait. They used pastel chalks for the finished piece.
Family Portrait in Clay
Teacher Sample: Students will have to use symbols to create their family portrait.
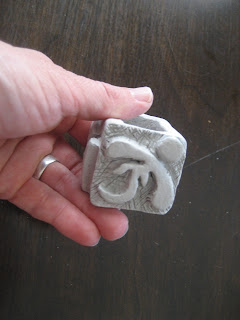
This is my example. I used symbols of my husband and I along with our 4 sons. I was able to use the stamp I made to create texture and interest.
Getting Ready for a New School Year - samples
The square design is great for having 4 different stamp applications. I love it. I will have an assignment that will utilize their stamp.
Sunday, May 6, 2012
District Art Show
I'm proud to say that two of my 3D Design art students received awards at the combined district art show. Yahoo!!!
Great job representing Sunset Ridge with your Giacometti inspired sculptures Sydney and Sam.
Student Work-Totem Spoons
What I originally thought was going to be a silly idea has turned out to be a GREAT project for the students. They love it, and they look forward to it. The fun thing for me is seeing all the different, individual ideas and learning something new about each student.
Monday, April 23, 2012
Creative Letter Step by Step
 |
| Create a letter style and cut out 2 of them. It must be 2 1/2 inches in width and flat on the bottom edge. |
 |
| Glue small cups to the letter surface, alternate the standing cups, like this. |
 |
| Then, glue the top letter form to the cups. Let dry. |
 |
| With one sided adhesive paper tape, measure the width of your form. Use the marks to make a crisp fold in the tape. |
 |
| Use a damp, not soaked sponge to get the glued surface of the tape wet. Don't over wet or you will loose the adhesive. |
 |
| Now, apply to your letter form. The folded edges with match perfectly and look crisp and nice. |
 |
| For rounded or curved edges, cut your paper/glue strips into segments. |
 |
| When applying to a curved edge, the pieces will be allowed to overlap making a nice clean edge. |
 | |
| Complete your letter, making it a solid letter form. |
 |
| Decorate with paper mache, paint, add embellishments and a motto or expressive words. Complete. |
Saturday, February 25, 2012
Wednesday, February 22, 2012
Egyptian Sculpture Step by Step
 |
| After looking at Egyptian art, design your sculpture of a historical Egyptian God or recognizable figure. Draw a front view and side view to show it's contour. |
 |
| Add traditional color and decorations, |
 |
| Show both the front view and profile in color. |
 |
| Find the main form or armature that you will be using. |
 |
| Create the shape that will be used to express your character. |
 |
| Use newspaper or foil to add detail to your sculpture. |
 |
| Attach with glue or tape. |
 |
| Now you can see the Jackal snout and its tail. When you get the form the way you like it, it's time to paper mache. |
 |
| Using a flour and glue mixture, cover your form with two coats of paper mache. |
 |
| Let dry. Then, its time to paint. Refer to your color sketch for the finishing touches. |
 |
| Jackal sculpture Student Work |
Subscribe to:
Comments (Atom)


